Animating between two sets of Auto Layout constraints is quite simple.
All you have to do is update your installed/configured constraints and then call layoutIfNeeded inside of a UIView.animateWith* closure.
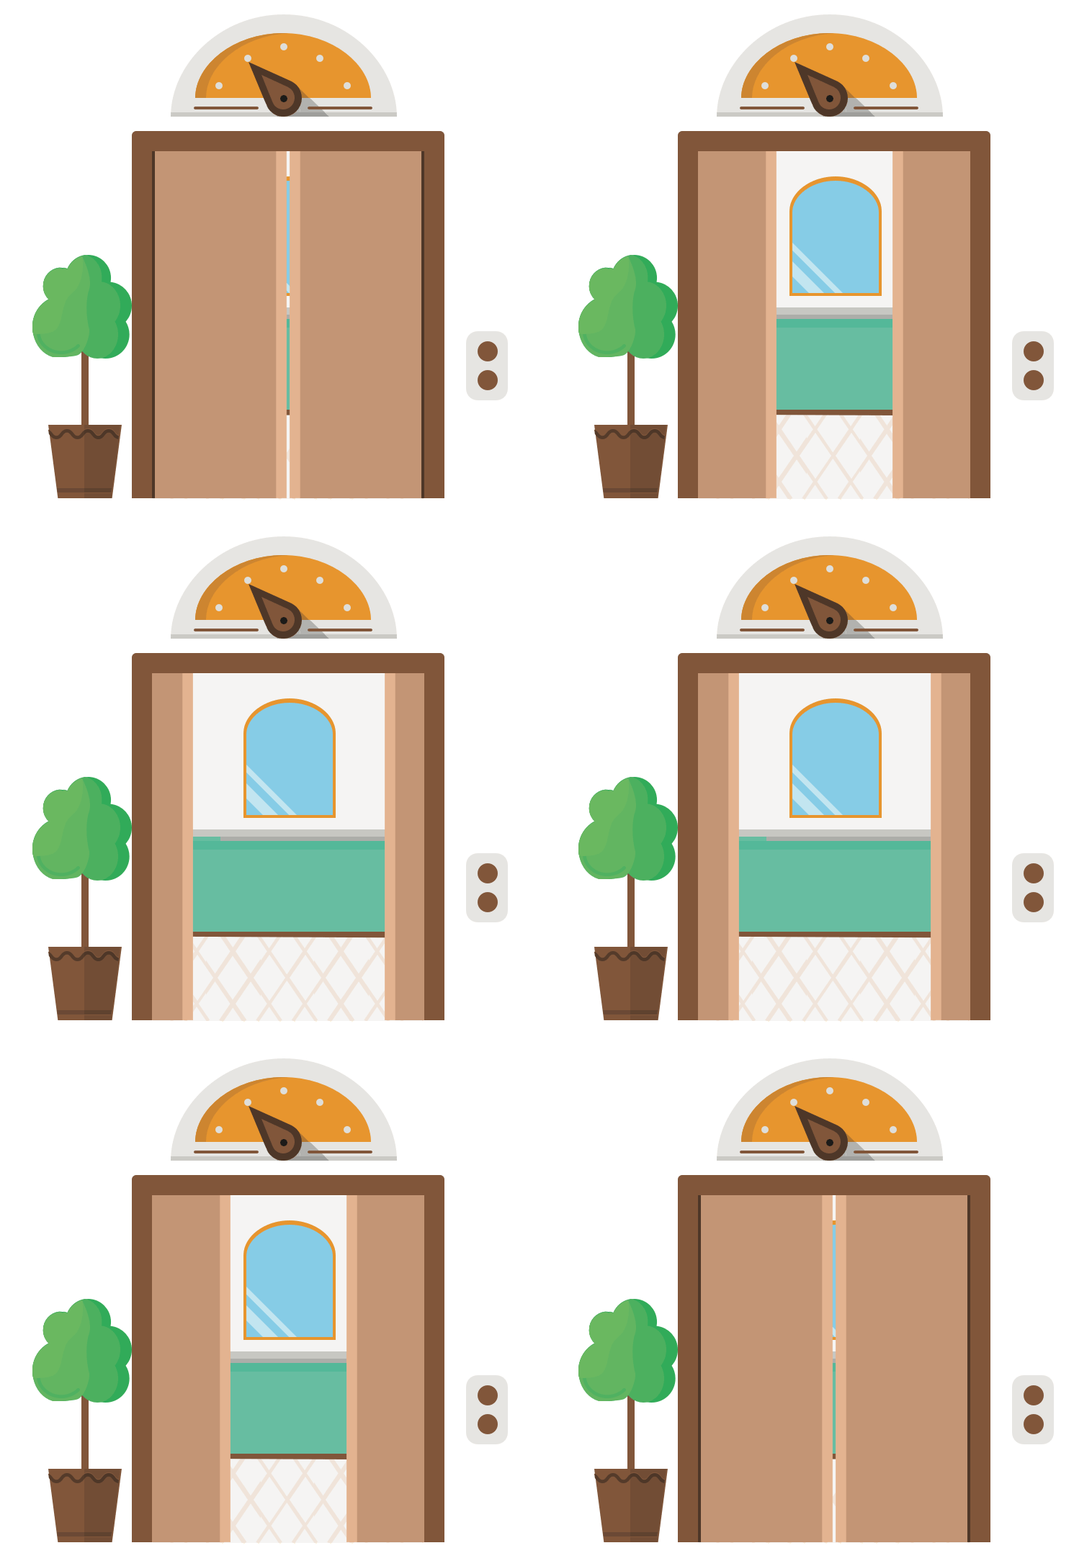
class DoorsViewController: UIViewController {
    var open: Bool = false {
        didSet { transition() }
    }

    func transition() {
        self.view.layoutIfNeeded() // force layout before animating

        UIView.animateWithDuration(0.4) {
            // change constraints inside animation block
            self.updateConstraintsForDoors()

            // force layout inside animation block
            self.view.layoutIfNeeded()
        }
    }

    func updateConstraintsForDoors() {
        leftDoorHorizontalConstraint.constant = open ? -16 : -leftDoorView.bounds.size.width
        rightDoorHorizontalConstraint.constant = open ? -16 : -rightDoorView.bounds.size.width
    }
}
Download sample project
SpriteKit is a phenomenal 2D game engine that ships in iOS and OS X. It has brought on a sort of renaissance amongst both amateur and professional game developers.
But what about using SpriteKit for fun, (and profit 🎉), and for things other than making games? What if we used SpriteKit to add special effects and final touches to our user interfaces?
class HeartBubblesScene : SKScene {
  var emitter: SKEmitterNode?

  override func didMoveToView(view: SKView) {
    // make scene's size == view's size
    scaleMode = .ResizeFill
    backgroundColor = UIColor.whiteColor()
  }

  func beginBubbling() {
    if let e = emitter {
      e.resetSimulation()
    } else {
      emitter = SKEmitterNode(fileNamed: heartsFile)

      let x = floor(size.width / 2.0)
      let y = heartHeight

      emitter!.position = CGPointMake(x, y)

      emitter!.name = "heart-bubbles"
      emitter!.targetNode = self

      addChild(emitter!)
    }
  }
}
class PotentialMatchViewController: UIViewController {
  @IBOutlet weak var heartBubblesView: SKView!
  let heartBubblesScene = HeartBubblesScene()

  override func viewDidLoad() {
    super.viewDidLoad()

    heartBubblesView.presentScene(heartBubblesScene)
  }

  @IBAction func interestedTapped(sender: UIButton) {
    heartBubblesScene.beginBubbling()
  }
}
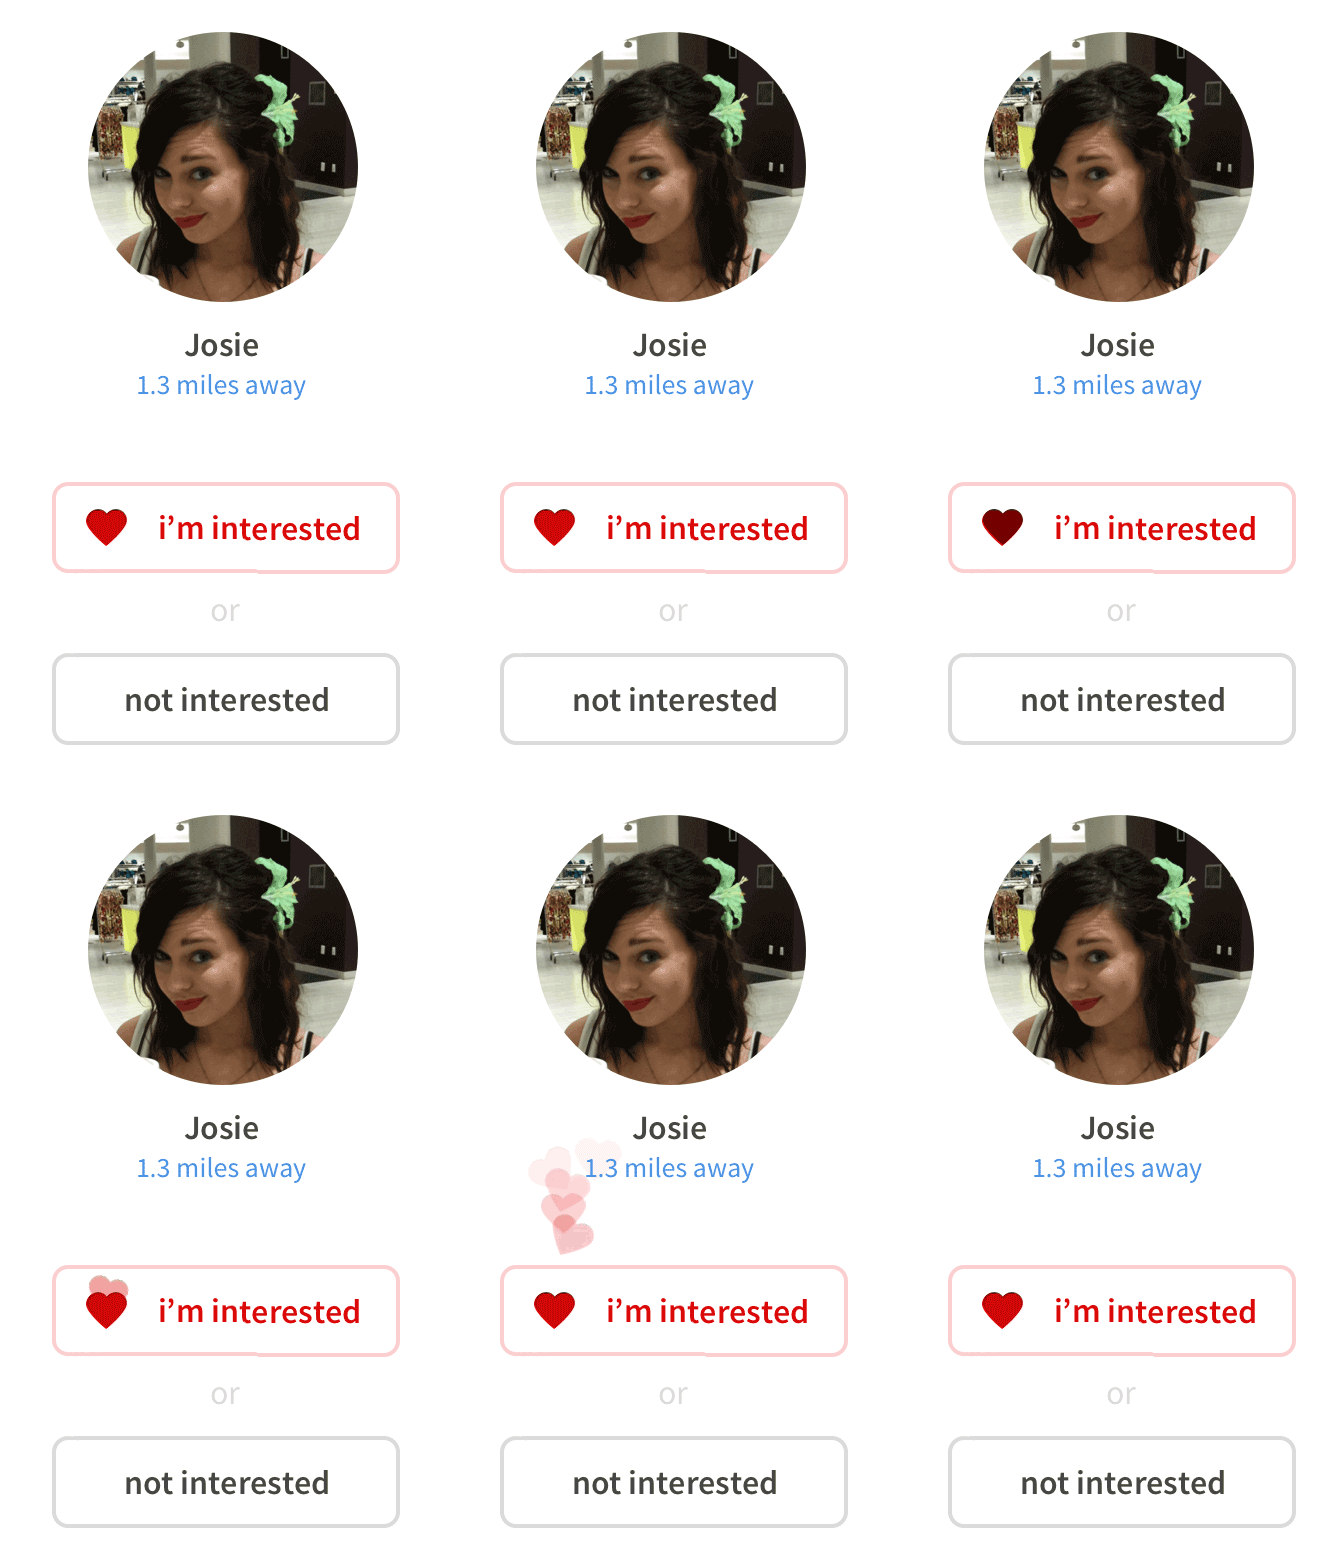
Here we're adding an awesome finishing touch to this pretend dating app. When the user taps the i'm interested button, we trigger an SKEmitterNode.
Download sample project
Starting in iOS 8 you can retrieve the places users visit.
class Chauffeur : CLLocationManagerDelegate {
  var manager: CLLocationManager

  func start() { manager.startMonitoringVisits() }
  func stop() { manager.stopMonitoringVisits() }

  // MARK: - CLLocationManagerDelegate

  func locationManager(manager: CLLocationManager!, didVisit visit: CLVisit!) {
    if visit.departureDate.isEqualToDate(NSDate.distantFuture() as! NSDate) {
      // A visit has begun, but not yet ended. User must still be at the place.
    } else {
      // The visit is complete, user has left the place.
    }
  }
}
CLVisit can and does deliver interesting results, but it’s not a slam-dunk yet. Best to use it for journaling-style features, or when it’s okay if it’s not always perfectly accurate. That being said, I tried it out, and was surprised how well it did.
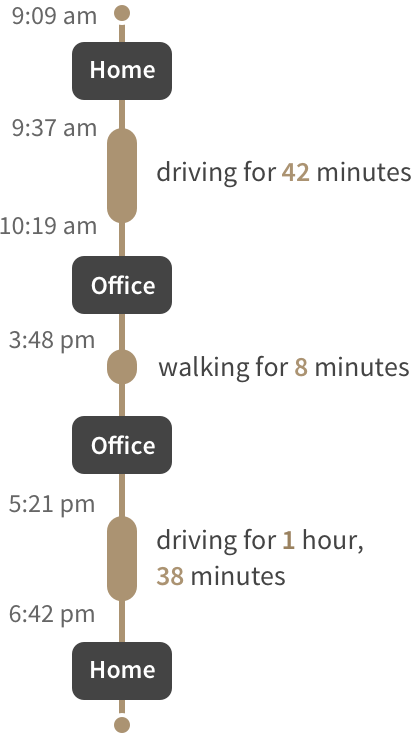
Here's an example "day" it tracked:
CLVisit Pros & Cons
- 👍 Polite to battery life
- 👍 Couldn't be simpler
- 😭 Not very accurate
- 😭 Visit data often arrives late
Today we'll take a look at a few handy tips and tricks to know about when debugging.
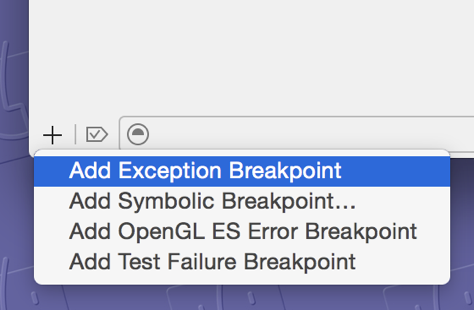
Exception Breakpoint
Make sure to always add an exception breakpoint to every project. Xcode will pause anytime an exception is thrown and let us poke around.
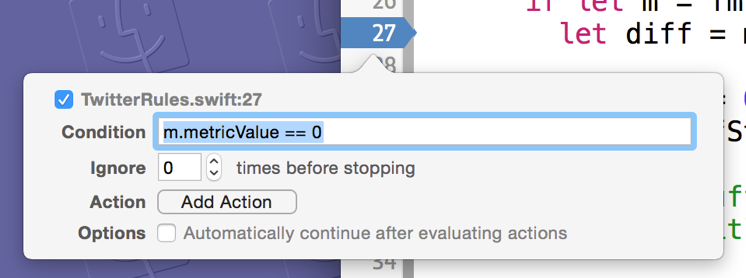
Conditional Breakpoints
Break exactly when we want to.
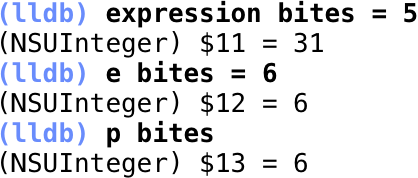
Evaluate an Expression
With expression or e we can even modify values in our app, and then continue running.
Property Breakpoints
Here's one that is not as widely known as it should be:

If we set a breakpoint on the line of code containing a property definition, our application will pause anytime that property's value is changing and display a stack trace of the function calls that ultimately caused the change.
Watch Screenshot Magic is an open-source OS X application from Imperiopolis that lets us easily create perfect Apple Watch screenshots, ready to upload to iTunes Connect.

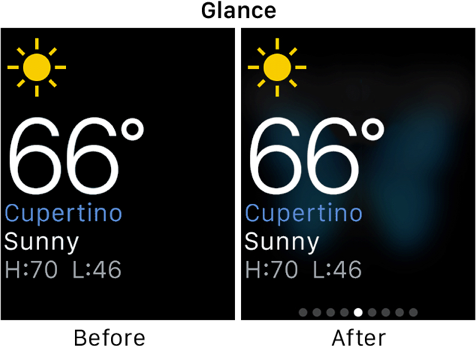
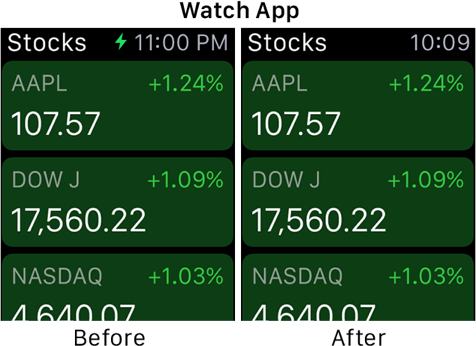
Features TLDR;
- ⚡ Removes charging icon
- ⏰ Clock always reads "10:09"
- ⌚ Glances + notifications on blurred watch face
- 👍 Adds page indicator to glances
More info about Watch Screenshot Magic can be found at git.io/wsm
Singletons are a design pattern describing globally accessible instances of objects.
They should only be used when we need to read and/or write some state globally and possibly from other threads.
class VehicleManager {
  static let sharedManager = VehicleManager()

  var cars: [Car] = []

  init() {
    // init some (likely) global state
  }
}
With a singleton, there's a function that can be called from anywhere. In this case it's VehicleManager.sharedManager.
A great side effect is that the initializer for VehicleManager() isn't called until we access .sharedManager the first time.
Singletons TLDR;
- 👍 Globally accessible
- 👍 Thread-safe
- 👍 Lazily initialized
- 😭 Technique shown here requires Swift 1.2 or later
Timepiece is a library from Naoto Kaneko that makes working with NSDate objects a bit more intuitive.
let now = NSDate()
let theForceAwakens = now + 218.days + 2.hours + 34.minutes
It also aids in quickly parsing dates from or rendering dates to a String:
let judgementDay = "1997-08-29".dateFromFormat("yyyy-MM-dd")
1.day.later.stringFromFormat("EEEE") // "Thursday"
Comparisons are simplified as well:
if (birthday > 40.years.ago) {
  midLifeCrisis()
}
How to Use Timepiece
In our Podfile:
platform :ios, '8.0'

pod 'Timepiece'
In any Swift file:
import Timepiece
More info about Timepiece can be found at git.io/timepiece
Making functions chainable is quite easy and can allow us to write using an almost DSL-like syntax.
We'll add a new function that does something and then return self. It's that simple.
enum CountdownType: Int { case ToTheSecond, ToTheDay }
enum ColorScheme: Int { case AfterMidnight, ClassyYellow, Tealfish }

class Concern {
  var title: String = ""
  func title(aTitle: String?) -> Concern {
    title = aTitle ?? ""; return self
  }

  var subtitle = ""
  func subtitle(aSubtitle: String?) -> Concern {
    subtitle = aSubtitle ?? ""; return self
  }

  var countdownType: CountdownType = .ToTheSecond
  func countdownType(type: CountdownType) -> Concern {
    countdownType = type; return self
  }

  var colorScheme: ColorScheme = .AfterMidnight
  func colorScheme(scheme: ColorScheme) -> Concern {
    colorScheme = scheme; return self
  }
}
It enables us to write extremely readable and composable code like this:
Concern()
  .title("Big Meeting")
  .subtitle("With those people from that place")
  .countdownType(.ToTheDay)
  .colorScheme(.Tealfish)
Setting properties is just the tip of the iceberg here. Imagine using this technique to create chainable queries:
Event
  .withCategory(.Meeting)
  .withAttendees([User.me])
  .sort { $0.startDate < $1.startDate }
Chainables TLDR;
- 👆write setters
- 🖖 return
self
- 🎉 profit
So, we're crafting our brand new view controller and BAM! we see this:

Let's try to break down how we got here:
Subclasses only inherit their superclass's initializers if certain conditions are met.
If our subclass doesn't define any designated initializers, it automatically inherits all of its superclass's designated initializers.
If not though, then it inherits none of them.
We subclassed UIViewController.
UIViewController implements NSCoding.
NSCoding requires init(coder:) be implemented.
By default UIViewController implements init(coder:) for us, and we don't need to do a thing.
But now, we defined our own new designated initalizer called init(), so we've stopped meeting the conditions for inheriting all of our superclass's designated initializers, and now have to override, implement and properly call super on init(coder:) all by ourselves!


