We've covered Auto Layout quite bit, but so far we've only been using the classes and APIs that Apple ships. Today we'll start checking out some third-party libraries that can improve our experience when working with Auto Layout.
We can pass in up to 5 UIView or NSView instances at once, then a closure. In that closure, we'll use ==, >=, or <=operators to define constraints upon the attributes of the view instances. This can really help improve readability:
constrain(viewA){ain// fixed sizes:a.height==44// centering inside a parent view:a.centerX==a.superview!.centerX// inequalities:a.top>=a.superview!.top+10}
But wait, there's more! We can capture the created constraints like this:
With additions like UIStackView, Auto Layout has matured into quite a powerful system for managing how our views are arranged on screen. When things go wrong though, it can sometimes be difficult to diagnose the specific cause of the issue. Today we'll look at a few techniques for making sense of the madness caused by... Auto Layout Bugs! 🐞🔪🔪🔪
Most issues arise from "Unsatisfiable Layouts". That's fancy-talk for "two or more constraints you gave Auto Layout conflict with each other." The solution will of course be different in every case, but here's some sensible things to ask ourselves when an error first occurs:
Is translatesAutoresizingMaskIntoConstraints set to false on the views we're adding constraints to?
Are the priorities of each of constraint, as well as content hugging and compression resistance priorities (Bite #69) what we expect them to be?
"Can this requiredconstraint work at a 999priority?" Remember, Auto Layout will try to get as close to our desired result as possible, while still satisfying all other constraints.
Identifiers
constraint.identifier="image-fixed-width"
Identifiers help us more easily spot the important bits in those giant log outputs Auto Layout loves to show us. They can be added in code or in Interface Builder.
When debugging complex layouts, it can sometimes be helpful to look at only the constraints involving a specific problem view or area. We can use this function to grab an array of the constraints affecting a particular axis. Neat.
Brain Surgery
When all else fails, don't be afraid to go in and start temporarily commenting-out or disabling constraints then observe the results. This can often lead to unexpected insights into how constraints are behaving.
Practice!
A great way to fight Auto Layout issues is to try to catch them before they happen. That means becoming more familiar with Auto Layout, which means practice. For example: When a question or issue comes up, create a new 'dummy' Xcode project. Throw some views and constraints in there and try it out. Tweak some priorities, observe their effects in the isolated environment. When in doubt, try it out!
Layout Guides & Anchors were added in iOS 9/OS X 10.11 as a more convenient way to add Auto Layout constraints. Let's dive in.
Layout Guides let us create sort of "invisible boxes" that exist solely for the purpose of layout. Instead of adding "spacer" views or using other such tricks, we can add some layout guides to a view, then add some constraints to them. It's a nice way to avoid needless performance wastes like rendering the dummy "spacer" views, and the code itself ends up being much more readable:
...into a set of much more readable short lines of code (shown below). The new code reads much more easily from left to right, and is much easier to scan and reason about what's going on.
UIView, NSView, and UILayoutGuide all have lots of new anchorproperties available to make adding constraints to them much simpler than before. We also get a little extra type safety as a bonus.
Like in Bite #99, we'll use Auto Layout Visual Format Language to pin the stack view's edges to its superview. Look at that, not bad for our first try!
Those views are close talkers, let's add some spacing:
stackView.spacing=10.0
Ack! What the heck is going on here?!
Let's break it down: In the default ‘Fill' distribution mode, if views don't naturally fill the axis of the stack view, the stack view will resize one (or more) according to their hugging priority (covered in Bite #69).
We'll solve our issue by setting a low hugging priority on our label, signaling to the stack view that it be the one to stretch, not our image view.
In Bite #98, we learned how to work with Auto Layout in code. While this helped us gain a ton of flexibility, our code is now a bit... verbose. For simple layouts this won't be a big deal, but for anything complex we would quickly rack of hundreds of lines of code for just our layout. Today we'll look at one solution for this issue: Auto Layout'sVisual Format Language. Let's take a look.
Before jumping into code, let's look at the Visual Format Language itself. It's essentially just a string that the system parses and turns into an array of NSLayoutConstraint objects:
"|-[header]-|"
The two pipes on the outside represent the superview. The dashes represent spacing, in this case, the system-standard spacing. Views are described with a name in brackets.
When parsed, this would create 2 new constraints: 1 leading and 1 trailing. It would keep the header the standard spacing away from the left and right edges of the superview. To let the system know our views by name we put them in a dictionary:
letviews=["header":header]
If we wanted to use a specific spacing amount we could describe that within dashes on the edges of our Visual Format Language:
"|-20-[header]-20-|"
That's fine for simple spacing, but what if we needed to reference lots of numeric values? We can name those and put them in a dictionary just like our views:
"|-edgeSpacing-[header]-edgeSpacing-|"
Now that we have a basic understanding, we can add our first set of constraints:
We've only scratched the surface of what's possible with Visual Format Language. In the future we'll look at configuring inequalities, constraint priorities, and more.
Auto Layout works great in Interface Builder, but it's often helpful to have the flexibility and clarity of wiring up constraints in code. Let's dive in.
We'll add a view and set translatesAutoresizingMaskIntoConstraints to false. Normally Interface Builder does this automatically under the hood, but since we're working in code we'll need to set it ourselves. Don't want any funky autoresizing constraints in there meddling around.
Whew! That's a long constructor. The neat part though, is from left-to-right it almost reads like the equations from before. Lastly, we'll assign a fixed size to our logo view. Since there's only 1 view involved, the equation is much simpler:
Content Compression Resistance Priority controls how the frame of a UIView will be calculated when one or more Auto Layout constraints describe its width or height as being smaller than its intrinsic content size. Let's look at a bare bones example:
Here's a button with a really long name:
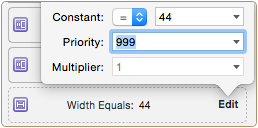
We've added a simple constraint telling Auto Layout to try to keep the width of our button at 44 points. Auto Layout does as its told and collapses our button making it completely unreadable. Don't worry, we can use Compression Resistance to stop this.
We select our button in Interface Builder, head over to the size inspector (⌘⌥ + 5), and set it's horizontal Compression Resistance Priority to 1000.
Now, we'll change the priority of our original 44 point width constraint to something less than 1000. We'll use 999 to emphasize the point, but this could be any number from 0 - 999.
Success! Auto Layout now allows our button'sintrinsic content size to take precedent over our width contraint:
Now that we understand Compression Resistance, understanding Content Hugging Priority is easy. It works in a very similar manner, but instead of managing whether a view is made smaller than its intrinsic content size, it deals with whether or not a view can be made larger than its intrinsic content size. Let's look at one more example to illustrate this, here's another button:
If we were to add a set of leading and trailing constraints, telling the button to be as wide as the view controller it's sitting on, it might look something like this:
But, if we set the horizontal Content Hugging Priority of our button to 1000, and the priority of those leading and trailing constraints to 999, our **button **becomes nice and small again:
UIStackView changes everything. New in iOS 9, you can think of UIStackView as an abstraction layer on top of Auto Layout. It arranges it's subviews and manages their constraints for you.
One way to think about UIStackView is as the UIKit-born cousin to WKInterfaceGroup, the main layout component for building Apple Watch apps with WatchKit.
UIStackViews layout their arranged subviews horizontally or vertically, and they provide options for how arranged subviews should be aligned and distributed.
You can of course nest many UIStackViews inside each other to easily and quickly create complex layouts. Let's test it out by creating something super common like a UITableViewCell to display a comment. We'll use 2 horizontal and 1 vertical UIStackView:
UIStackView Pro Tips
🌀 Set views to hidden for easy conditional layout
🏃 Hide views in animation blocks to animate the re-layout
🎳 Use size-classes to easily alter layout for different environments
Animating between two sets of Auto Layout constraints is quite simple.
All you have to do is update your installed/configured constraints and then call layoutIfNeeded inside of a UIView.animateWith* closure.
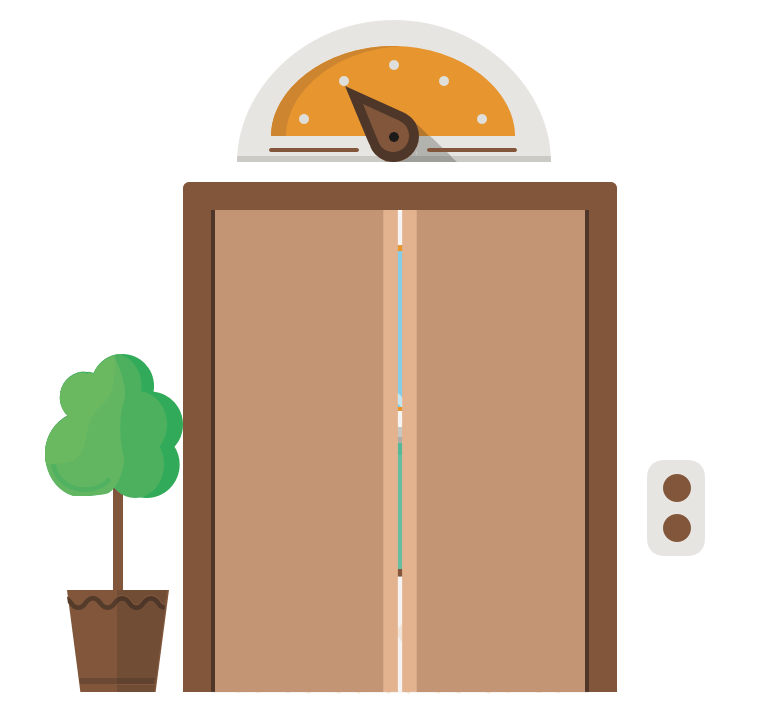
classDoorsViewController:UIViewController{varopen:Bool=false{didSet{transition()}}functransition(){self.view.layoutIfNeeded()// force layout before animatingUIView.animateWithDuration(0.4){// change constraints inside animation blockself.updateConstraintsForDoors()// force layout inside animation blockself.view.layoutIfNeeded()}}funcupdateConstraintsForDoors(){leftDoorHorizontalConstraint.constant=open?-16:-leftDoorView.bounds.size.widthrightDoorHorizontalConstraint.constant=open?-16:-rightDoorView.bounds.size.width}}